Kismet Mondo Bag by Quilt Smart

We have a new pattern added to our shop: The Mondo Bag by Quilt Smart. Each pattern contains instructions and printed interfacing to make one Mondo bag, and if you can't tell by the pictures...it's a big bag! This bag would be great for traveling, trips to the post office, or carrying quilts and projects to your favorite quilt shop. It's so versatile and has many uses! The pattern has step-by-step instructions as well as pictures, but I took some photos along the way to share with you all. Enjoy!

We made our bag with 5" squares.
First step is choosing your fabric. I knew I wanted to make something with the Kismet collection by Art Gallery Fabrics. This collection is so beautiful and has a lot of floral (which I love!) and low volume prints. You can purchase the fabrics in this collection HERE.
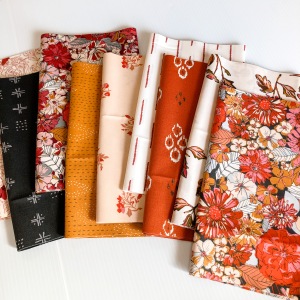
The Mondo bag requires 192 - 2 1/2" squares OR 48 - 5" squares of fabric. I decided to use 5" squares and used 8 of the prints from the fabric collection, so I had 6 squares of each print. I also used a little over a yard for the lining and extra squares for the handles. You will also need fusible fleece to construct the bag.
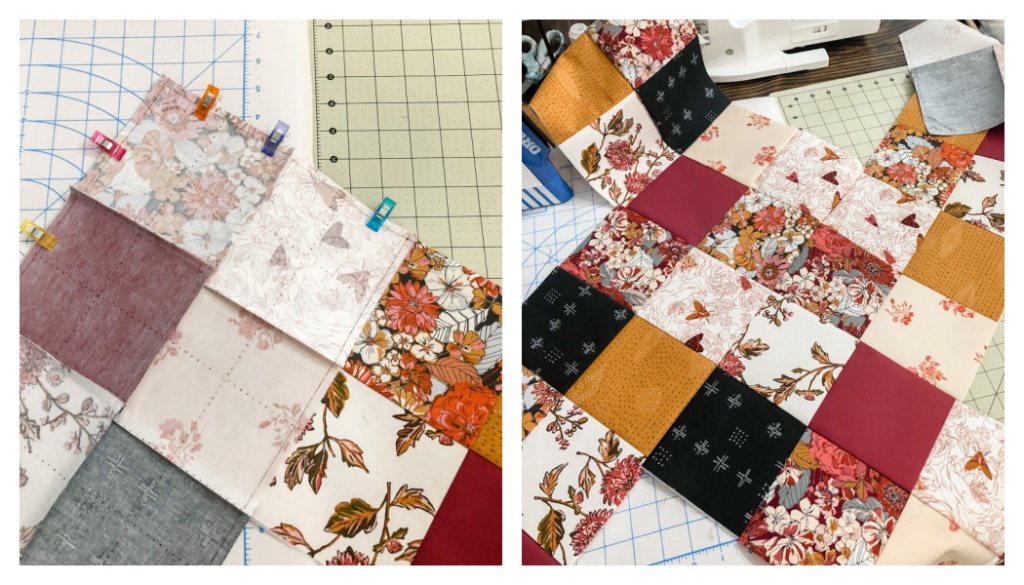
Like I mentioned, the pattern includes printed fusible interfacing to make the bag, and it's relatively easy to construct. The first step is to cut your interfacing down to 4 rectangles. You will then place your squares right side up between the dotted lines on the interfacing fusible side up. Once you have your fabric arranged how you want, fuse them with your iron on a steam or low heat setting.

(2) Squares fused right side up to printed grid interfacing
(3) View of backside of interfacing
Once all 4 rectangles are fused, you will then sew each row across and lengthwise 1/4" from the dotted lines. This will allow your squares to line up perfectly! Press all seams using the directional arrows on the back of the interfacing. You will need to clip the intersections since they are pressed in opposite directions.

(3) Front view after seams have been pressed
After all 4 of your rectangles are sewn and pressed, set aside and now assemble the handles. I decided to use 12 leftover squares, cut them in half to make 2 1/2" wide and sewed them together to make 4 strips for my handles. I later learned that I should have only used 2 strips and used my lining fabric for the backside of the handles. I also forgot the add the fusible fleece to my handles. Be sure to follow the instructions in the pattern to complete this step, so you don't make the same mistake I did!

Next, cut your lining and fusible fleece in 4 rectangles the same measurements as your pieced rectangles. Fuse the lining to the fleece on all four cuts. For my lining, I chose the Cloak & Petal print from the Kismet collection. You can purchase it HERE!
Now, you are ready to assemble the bag! Follow the directions from the patterns to sew the rectangles pieces one by one to make the construction of the bag. This part can be a little tricky, so I suggest using clips and/or pins to get it right before you start sewing.
You will first sew 2 rectangles to make an "L" and then sew the other 2 together the same way. Then, you will sew both "L" pieces together to form the bottom of the bag.
(2) After all 4 rectangles are sewn. This is the bottom of the bag.
Next, follow the directions and sew the sides together forming the bag. You will do this again with the lining pieces, except leave a 4-5" opening for turning inside out. You will end up with 2 bag forms; one with your outer fabric and one with your lining.

We're so close! Pin or clip your handles to your bag right sides together and stitch across the Handle Stitching Line. (Follow the pattern directions for this step)
Next, place your lining piece inside your main bag right sides together and pin or clip all around. This is where the wonderful Wonder Clips are so convenient! We sell them in our shop here.

Now, stitch along the solid line all around your bag making sure you pivot around handle edges. Turn your bag right side out, hand or machine stitch your opening closed, and topstitch around top edges.
Congrats! Your bag is finished!

What I really liked about this pattern is the printed interfacing and guides. If you'd like to make this bag, we have all the fabrics used, bag pattern and notions in our store.
Let's take a look at everything we used:

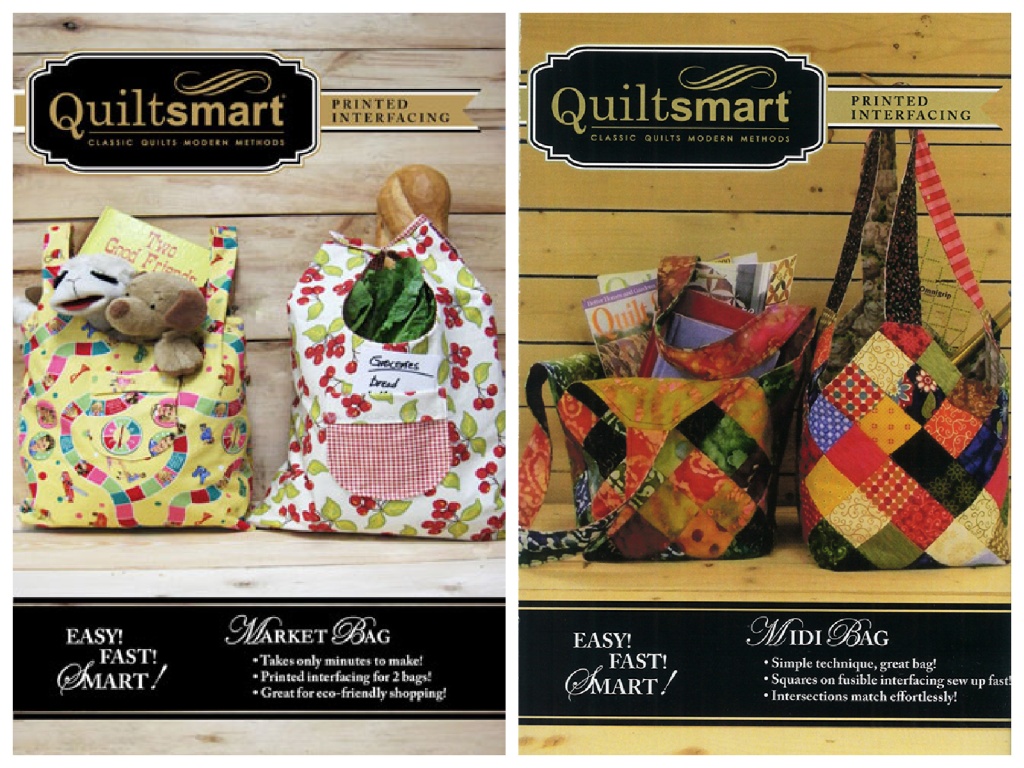
If the Mondo bag isn't for you, take a look at the other patterns by Quiltsmart we have available in our store
Thank you for reading and enjoy your new bag!!
Recent Posts
-
Holiday Sewing: Easy Apron Tutorial (3 sizes!)
Handmade aprons are my jam! I love making an apron for any occasion. It's a great project for many r …Nov 9th 2022 -
LINEN FABRIC - PERFECT FOR INTERIOR DECORS & CLOTHING
Hello Fabric-Fairies!For its softness, durability, and anti-bacterial properties, linen is loved by …May 4th 2022 -
Sewing Projects Using Fabric With Words Printed On It
Hello Fabric Lovers! As you already know, this blog is all about creating interesting sewi …Apr 2nd 2022