Divided Basket Fabric Project Kit / AGF Homebody
We now have Fabric Project Box Kits! This project box kits contains everything you need to make the Divided Basket by Noodlehead. In your box, you will receive the Divided Basket pattern, fabric, fusible interfacing and fleece, AND a pack of 10 Wonder Clips that we used to complete this project. Keep reading for all the details:
The Divided Basket pattern by Noodlehead, complete with a front pocket, a divider and handles makes for the perfect organizer in any way you choose! Store sewing or knitting supplies, magazines, diapers and wipes, or set it on the counter to stash mail and other items. This fabric basket is fun to make and functional, so we couldn't help but create a Project Kit for you to make your own!

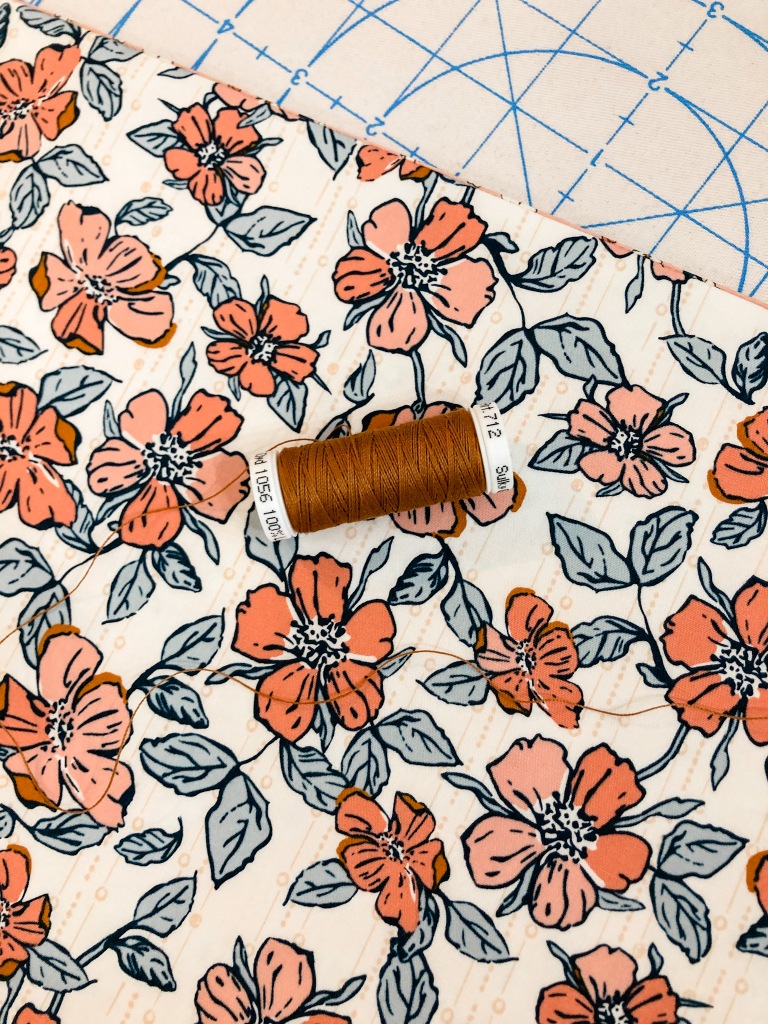
I knew when I saw this pattern that I wanted to use the fabrics from the Homebody collection by Art Gallery. Art Gallery Fabrics is known for their beautiful, modern prints on the softest quilting cotton. When Homebody released last month, we knew this collection was going to be breathtaking. Maureen Cracknell's beautiful designs are as gorgeous in person as they are on the computer screen.

You can purchase the Project Kit for the divided basket here. You can also purchase the pattern alone here. The pattern includes a full-color booklet with fold out templates and step-by-step instructions. The fabrics I used for this basket are: Domestic Charm Birch for the main exterior, Crafted Blooms Vanilla for the pocket and handles, and Homelike Dreams for the lining. In addition to the quilting cotton, you will also need fusible interfacing and fusible fleece to complete this project. When you purchase the Project Kit, you will receive all the required measurements of the quilting cotton, fusible interfacing and fusible fleece plus a pack of 10 Wonder Clips!
The additional supplies needed and what I used are: sewing machine, iron & pressing mat, thread, pins, scissors, cutting mat and rotary cutter, Pilot Frixion marking pen and Wonder Clips. I also used my walking foot, which is not required, but more convenient due to the bulkiness of the layers.

I suggest reading through the pattern before beginning to familiarize yourself with the process. I like to do this, so I can know what's ahead and I don't miss any steps. The first step for this project is tracing and cutting all your pieces and then fuse the interfacing and fleece to their corresponding fabrics.
The next step is constructing the divider and lining. Follow the instructions in the pattern to assemble the lining. When you are finished, you will have a visual of what the basket will look like with the sewn in divider. Set the lining aside and begin constructing the bag exterior.

The next step is constructing the outer pocket. After I sewed the lining to the pocket fabric, I changed my thread to a coordinating thread for the topstitch.
I also used this thread at the end when I did my final topstitch around the entire basket. I liked the added touch it gave to the overall look!

When you finish the pocket section, now it is time to sew together the exterior pieces, putting together the basket. This is where my wonder clips came in. With all the extra layers of fabric, fleece and interfacing, using the clips help a lot better than pins.

With your exterior pieces Right Sides Together, sew the sides and bottom, leaving the top open. DO NOT SEW THE CORNER SQUARES!
After sewing the sides and bottom, use the same method you did for the lining and sew the corner pieces together. Turn right side out and you have the basket formed!
Now it is time to assemble your handles by following the directions in the pattern. These are pretty easy to do! The patterns calls for two options for the handles: fabric only handles or cotton webbing handles. I chose to make fabric-only handles. (Note: The Project Kit only contains materials to make the fabric-only handles)
Next, pin or clip the handles to the basket 1" to the left and to the right of the side seams. Place them right sides together and sew. Repeat on other side of basket.

You are so so close! This is where I took a break and fixed a cup of coffee. I knew I was in the home stretch, and I didn't want to rush myself adding the final touches. Anyone else do this too??

For the final step, press your lining 1/2" down around the entire lining. Do the same to your basket. Pressing the basket was a bit hard to do, so I clipped it down with my wonder clips.
Insert the lining in the basket lining up the top edges all around it. Work your way around the basket clipping the edges, matching the seams on both ends. It also helped to smooth out the bottom of the basket pressing the lining with my hands as I worked my way around it.
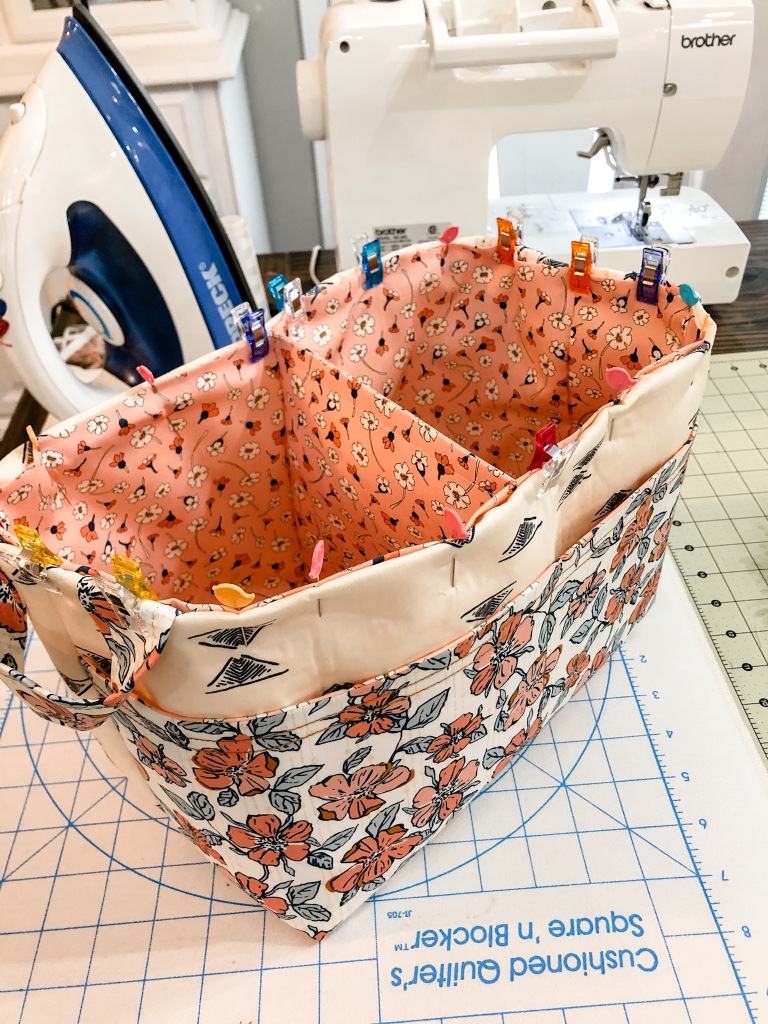
Now, top stitch along the top edge all around the basket. Make sure you maneuver around the handles.

You're done! Now fill it with lots of goodies and utilize however you wish. Need a baby shower gift? Fill with diapers and wipes and gift to an expecting mom. Need a housewarming or wedding gift? Fill with dish towels and kitchen tools for the newlyweds. Or keeping for yourself? (No judgment here! I kept mine too) However you plan to use your divided basket, pat yourself on the back because YOU DID IT!

You can purchase your Divided Basket Project Kit now from Broadway Fabrics! We hope you enjoy your project and have so much fun! Isn't that what sewing is all about?
Thank you for reading,
Michelle
Recent Posts
-
Holiday Sewing: Easy Apron Tutorial (3 sizes!)
Handmade aprons are my jam! I love making an apron for any occasion. It's a great project for many r …Nov 9th 2022 -
LINEN FABRIC - PERFECT FOR INTERIOR DECORS & CLOTHING
Hello Fabric-Fairies!For its softness, durability, and anti-bacterial properties, linen is loved by …May 4th 2022 -
Sewing Projects Using Fabric With Words Printed On It
Hello Fabric Lovers! As you already know, this blog is all about creating interesting sewi …Apr 2nd 2022